

Quick Summary
Fixing a leaking chimney means addressing the exact source, from a cracked crown or damaged flashing to worn mortar or a missing cap. Professional repair starts with a full inspection, followed by targeted fixes like tuckpointing, flashing replacement, or waterproof sealant. Catching and repairing these issues early keeps water out of the masonry and protects the rest of the home from hidden damage.
Part one covered the common causes behind a leaking chimney, from a cracked crown to a missing cap. This second part walks through what professional chimney leaks repair looks like once those causes get identified, and why hiring a trained team makes a difference in how long the fix lasts.
From the first inspection to the final seal, knowing what to expect helps homeowners feel confident about the process and the investment. This part covers the repair techniques used to fix crowns, flashing, mortar, caps, liners, and sealant, along with what determines cost and how to choose a repair team you can trust.
Why Bring in a Professional for Chimney Leak Repair
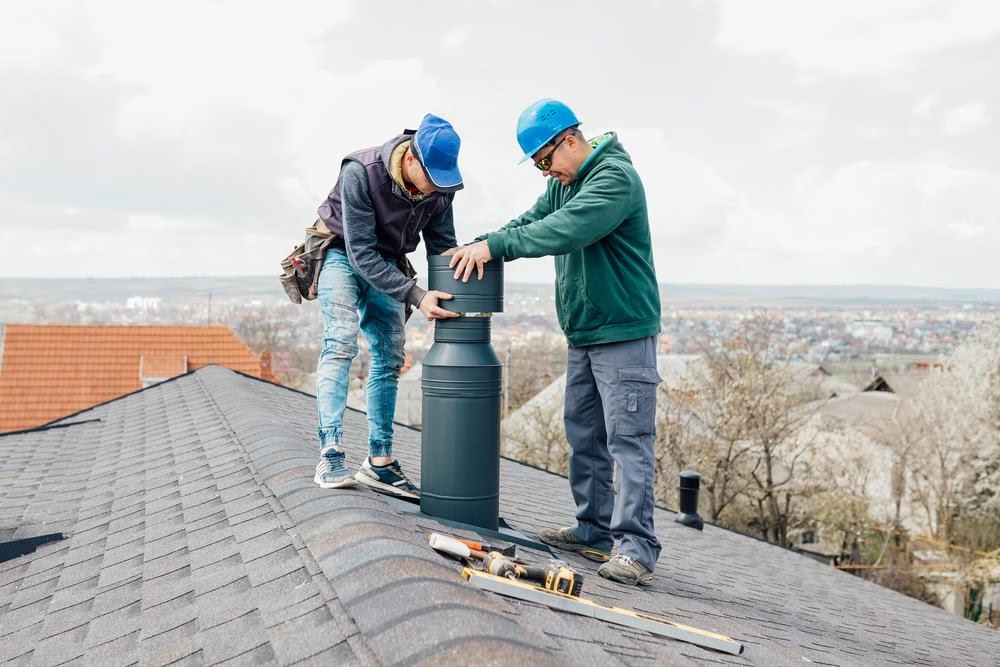
Chimney repair sits high above the ground and involves masonry, flashing, and roofing work that overlaps in tricky ways. A professional brings the right ladders, safety gear, and tools to reach every part of the chimney safely, along with the experience to spot problems that aren’t obvious from the ground. Patching a visible crack without finding the real source often means the leak comes back within a season.
A trained technician traces water back to its starting point and repairs the full path, not just the spot where the stain shows up. Chimney work also involves the roofline itself, so a repair that ignores how flashing ties into the surrounding shingles can create a new leak somewhere else. Professionals coordinate the chimney repair with the roofing system as a whole, which keeps the fix from shifting the problem instead of solving it.
What Happens When a Chimney Leak Goes Unrepaired
Ignoring a chimney leak almost never makes the problem smaller. Water that keeps entering through a cracked crown or failed flashing continues to soak into the brick and mortar with every rainfall, and freeze-thaw cycles widen existing cracks each winter.
Left long enough, this moisture leads to spalling brick, a rusted damper, stained ceilings, and in serious cases, structural damage that threatens the chimney’s stability. What starts as a repair costing a few hundred dollars can turn into a project involving a partial or full rebuild if the damage spreads far enough. Addressing a leak as soon as it appears keeps the repair smaller and the cost lower.
The Professional Chimney Leak Repair Process
A proper repair follows a clear sequence of steps.
Step 1: Full Inspection A technician checks the crown, flashing, mortar joints, cap, and liner, along with the attic and interior walls near the chimney, to find every entry point.
Step 2: Diagnosis and Documentation Photos and notes capture the condition of each component, which helps explain the findings and gives the homeowner a clear picture of what needs work.
Step 3: Targeted Repair Work begins on the specific problem areas, from resealing the crown to replacing flashing, repointing mortar, or installing a new cap.
Step 4: Final Check and Cleanup Once repairs are complete, the team checks for remaining gaps, cleans up debris, and walks the homeowner through the work that was done.
Common Chimney Leak Repairs Explained
Different leak sources call for different fixes.
Crown Repair or Replacement: A cracked crown gets sealed with a waterproof coating, or replaced entirely if the damage runs deep. A properly sloped crown pushes water away from the flue instead of letting it pool. Homeowners can expect a crown repair to hold up for many years when done with the right waterproof material and a proper slope.
Flashing Replacement: Old or damaged flashing gets removed and replaced with new metal, sealed tightly against both the roof and the chimney to close the gap where leaks often start.
Tuckpointing and Mortar Repair: Crumbling mortar joints get raked out and repacked with fresh mortar, restoring the strength of the brickwork and closing the paths water uses to get inside.
Chimney Cap Installation: A new cap keeps rain, snow, and animals out of the flue, and it stops water from pouring straight down into the fireplace below.
Liner Repair or Replacement: A cracked liner gets patched or replaced to stop water and condensation from reaching the brick and to keep gases venting safely. Stainless steel liners are the most common replacement choice today, since they resist heat and corrosion better than older clay tile liners.
Waterproofing and Sealant: A breathable waterproof sealant applied to the brick keeps new moisture out while letting existing moisture escape, which helps prevent spalling and further brick damage.
Materials Used in Professional Chimney Leak Repair
The materials used in a repair play a large role in how long it lasts. Flashing typically gets replaced with aluminum, copper, or galvanized steel, chosen based on the chimney’s existing metal and the homeowner’s budget. Crown repairs use a waterproof, flexible coating designed to expand and contract with temperature changes instead of cracking the way a rigid patch would.
Mortar for tuckpointing gets mixed to match the strength and color of the original brickwork, since a mismatch can cause uneven wear over time. Sealants applied to brick are chosen for being breathable, which lets trapped moisture escape while still blocking new water from getting in. Choosing the right material for each repair, rather than a one-size-fits-all product, is part of what separates a lasting fix from a temporary patch.
DIY Repair Vs. Professional Chimney Leak Repair
Some small tasks, like clearing debris from a cap or checking gutters near the chimney base, are safe for a homeowner to handle. Sealing a crown, repointing mortar, or replacing flashing calls for a different level of skill, along with safety equipment most homeowners don’t have on hand.
A repair done without the right materials often fails within a year, since general-purpose sealants and patches aren’t built to handle the freeze-thaw cycles a chimney faces. Working with a professional also means the repair comes with a warranty, so any issues that come up after the work gets addressed without an added cost.
What Affects the Cost of Chimney Leak Repair
A few factors shape the price of a repair. The type of damage plays a large role, since a simple resealing job costs far less than a full crown replacement or liner repair. The height and pitch of the roof also affect cost, since steeper or taller chimneys take more time and equipment to access safely.
Chimneys with more than one issue, such as a cracked crown paired with damaged flashing, often cost less to fix together than as two separate service calls. Getting a written estimate after the inspection helps avoid surprises, since a clear breakdown shows exactly what each part of the job covers.
How to Choose a Chimney Leak Repair Team
Look for a contractor with a proven history in the local area, since regional weather patterns affect which repairs hold up best over time. A licensed and insured team protects the homeowner from liability if anything goes wrong during the job.
Ask about warranties on both labor and materials, and look for a company willing to document the work with photos so there’s a clear record of what got fixed. A team that explains the cause of the leak in plain terms, rather than jumping straight to a sales pitch, tends to be the one worth trusting with the job. Reading recent customer reviews also gives a sense of how a company handles communication and follow-up after the work is finished.
Preventing Future Chimney Leaks After Repair
A repair holds up best with a bit of ongoing care. Schedule a yearly inspection to catch small issues before they turn into leaks again, and keep gutters clear so water flows away from the chimney base instead of pooling nearby.
Trim back tree branches that drop debris onto the crown or cap, and address small cracks in the mortar or sealant as soon as they appear rather than waiting for the next inspection cycle. Keeping records of every inspection and repair also helps if you decide to sell your home, since it shows buyers the chimney has been properly maintained.
Call American Chimney Gutter & Roofing for Chimney Leak Repair
At American Chimney Gutter & Roofing, we’ve spent close to 30 years repairing chimney leaks for homeowners across Marietta and Northwest Georgia. Our team traces every leak back to its true source before starting any work, and we document each step with photos so you know exactly what was repaired and why.
We’re licensed and insured, A+ rated with the Better Business Bureau, and we back our repairs with a solid warranty on both labor and materials. From crown and flashing repair to full liner replacement, our team brings decades of hands-on experience above the roofline.
Call American Chimney Gutter & Roofing today to schedule your chimney leak inspection and get the problem fixed for good.
FAQs
How long does a professional chimney leak repair take?
Most single-issue repairs, like flashing replacement or crown sealing, get finished in a day. Larger jobs involving multiple repairs, such as a new liner alongside crown work, may take two to three days depending on the scope.
Will homeowners insurance cover chimney leak repair?
Coverage depends on the cause. Damage from a sudden event, like a storm, is often covered, while leaks caused by gradual wear and lack of maintenance typically aren’t. A documented inspection history works in your favor if you need to file a claim.
How do I know if my chimney leak repair was done correctly?
A proper repair comes with photo documentation and a clear explanation of what was fixed. The best sign of a lasting repair is a dry chimney through a full season of rain and freeze-thaw cycles, with no new stains or drips appearing indoors.
Can a chimney leak be repaired without removing the whole chimney?
In most cases, yes. Repairs typically target the specific failed component, such as the crown, flashing, mortar, or liner, rather than requiring a full rebuild. A complete rebuild is usually reserved for chimneys with major structural damage throughout.